Introducing Different Parameter Setup Methods for Different Vector Software | Laser Engraving, Vinyl Cutter, UV Printer - GCC
| Vector editing software is most commonly used by Laser Engravers since users can use it to utilize engraving and cutting of working objects. Amongst the vector software available, CorelDRAW, Illustrator, and AutoCAD all have their supportive users, and can be integrated with LaserPro Laser Engraving systems to offer efficient completion of tasks. |
| The abovementioned software all correctly fine-tunes with Laser engraving systems, but users can be troubled when parameters would differ by task or model at hand. For that reason, this month the LaserPro Hot Tips will introduce different parameter setup methods for different vector software to offer users with more effortless setup. |
| Hot Tips will illustrate setup steps for all vector software in two sections: |
|
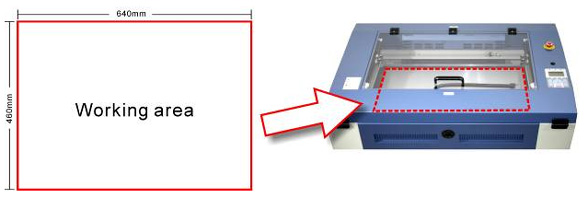
| Page setup has the advantage that contents displayed on the screen will exactly match to the dimensions of your working area. This offers more precise setup and process as users can simply place the working object on the set axis of the screen that depicts accurate representation tasks at hand. |
|
| Upload files to the machine via printing function is simple, but not all software can accurately output the required file. The challenge here is how to accurately upload your file to the machine, and here we will provide a solution for you. |
|
|
| Step 1. Page Setup Tips |
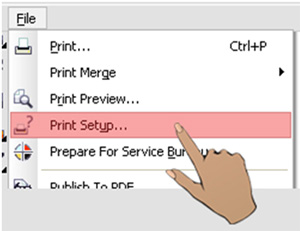
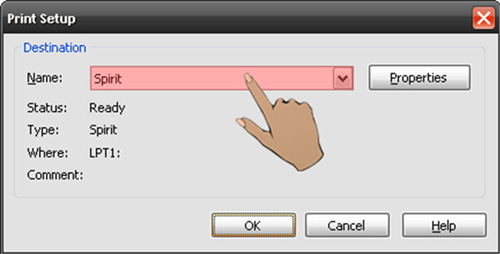
| - At the CorelDRAW toolbar please click File à Setup Print, and select your printer model. |
|
|
 |
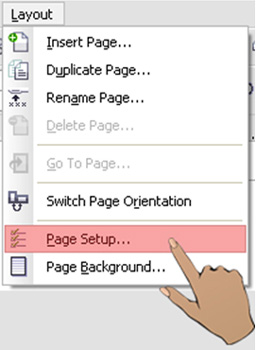
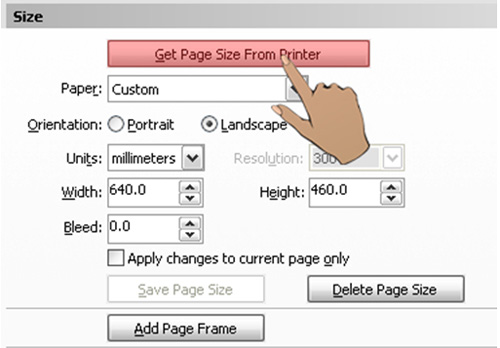
| - Select Layout à Page Setup à Get Page Size from toolbar to obtain dimensions of the working station. |
|
|
|
|
| - After parameters are set, your screen will match what you see on the working table/area. |
 |
| Step 2. File Transfer Tips |
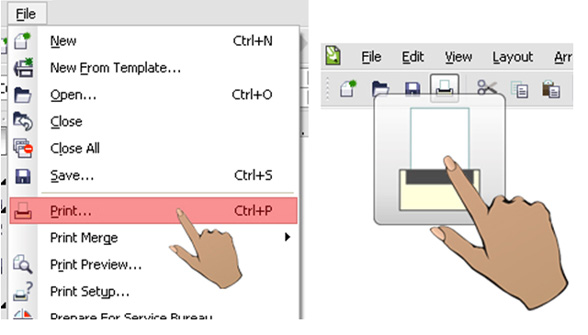 |
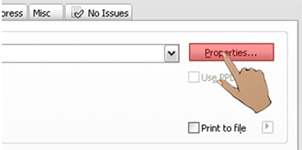
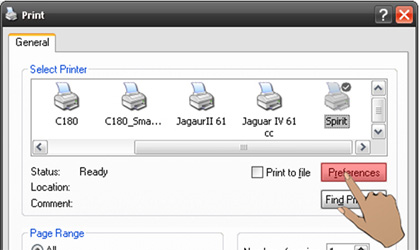
| - Click Properties to set parameters |
 |
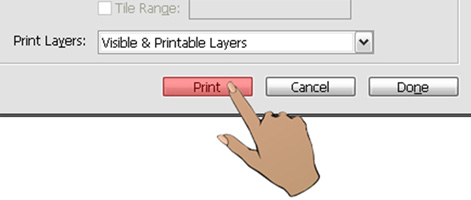
| - After parameters are set, press Print to complete file upload. |
 |
 |
| Step 1. Page Setup Tips |
| Click here to download file |
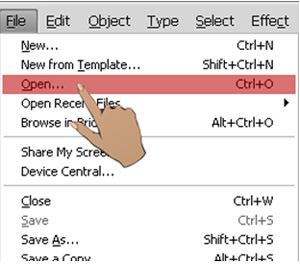
| - Click from the toolbar File à Open... |
 |
| - Within the File page, please select your machine model (e.g. Spirit) |
 |
| - When opened, it will equate to the dimensions of your working table |
|
|
| Step 2. File Transfer Tips |
| Deselect Enable Advance Printing Features |
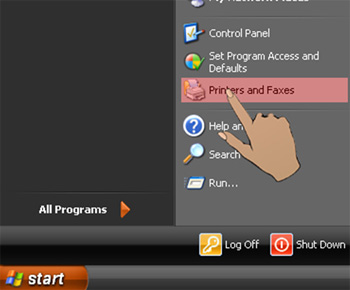 |
| - Select your printer (for example, Spirit), right-click your mouse and choose |
 |
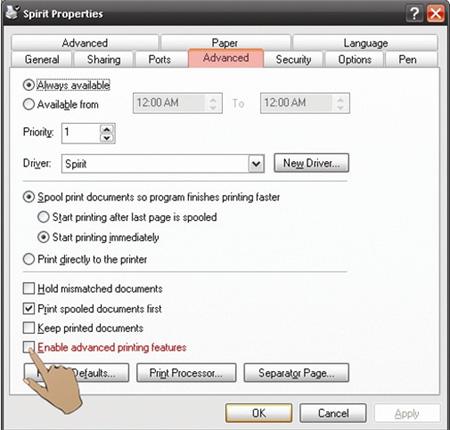
| - The click the Advanced tab, then deselect Enable Advance Printing Features, now all files can be recognized and uploaded. |
 |
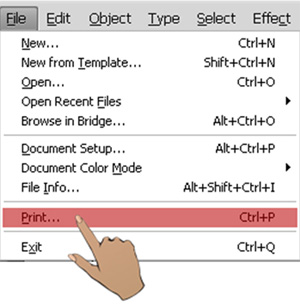
| File Transfer |
 |
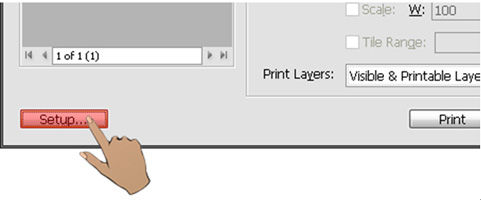
| - At the print setup screen, at Print Preset please select Custom, and choose your printer (e.g. Spirit) |
 |
| - Then click on the lower left tab of Setup to enter Preferences settings. |
 |
 |
|
 |
 |
| Step 1. Page Setup Tips |
| - To create a template file, please clickFile à New… |
 |
| - Select any available template. |
 |
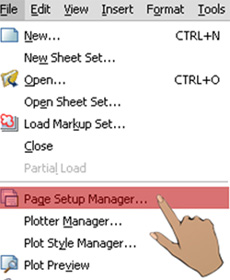
| - When file opened, please click to choose File à Paper Setup Manager... |
 |
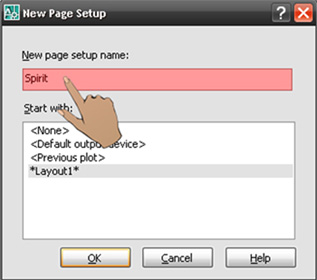
| - Exit the Page Setup Manager screen, then click the New tab on the right, and key-in your machine model (e.g. Spirit), and press OK. |
 |
 |
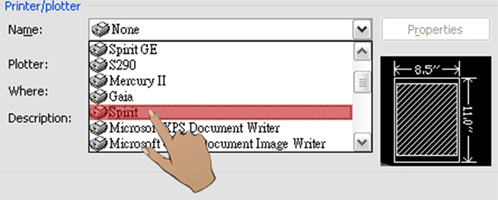
| - At the Printer/plotter screen, select your model (e.g. Spirit) and press OK. |
 |
| - For Paper size, please choose Custom Size. |
 |
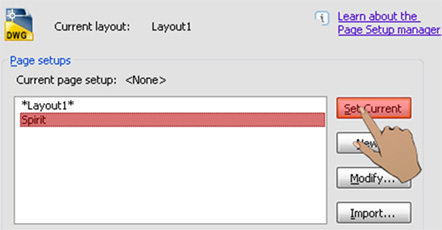
| - Press OK to return to Page Setup, and choose the previous model selected, and then click on Set Current button |
 |
| - Click Close to exit Page Setup window, then at the working page please click on the Layout1 tab, then the screen will be displayed like your working screen. |
 |
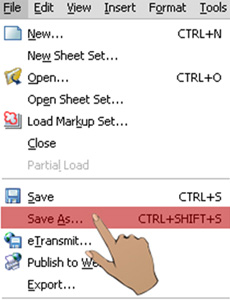
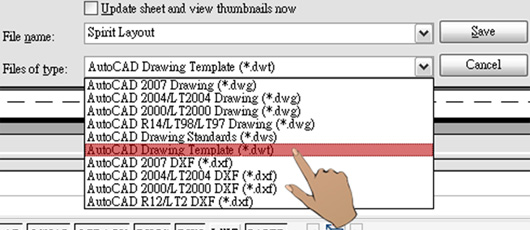
| - Lastly save this file, please click File à Save as..., enter the filename that you wish to save, and save in the format of AutoCAD Drawing Template (*.dwt) |
 |
 |
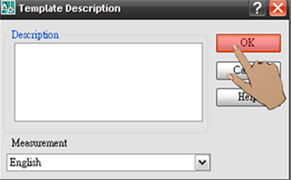
| - As you press Save, a screen of Template Description will pop up, just press OK. |
 |
| - In the future as you open up a new file, just select this Template file to let AutoCAD automatically complete the working setup for you. |
 |
 |
| Step 2. File Transfer Tips |
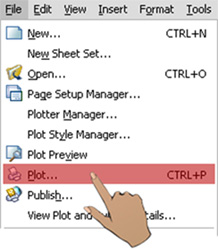 |
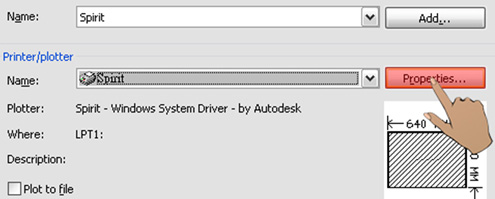
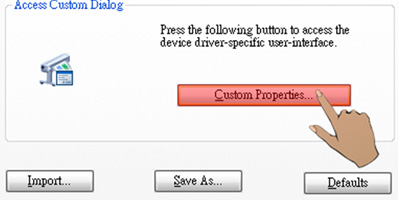
| - Select Properties à Custom Properties... for parameter setup. |
 |
 |
| - After all parameters are set, press OK, then the ‘Changes to a Printer Configuration File’ screen will pop up, press OK again. |
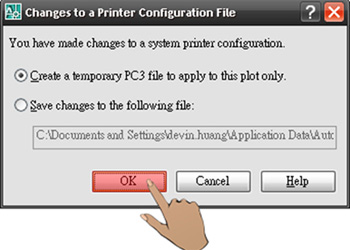 |
| - Lastly click the OK tab below and upload your files to your model. |
 |


